
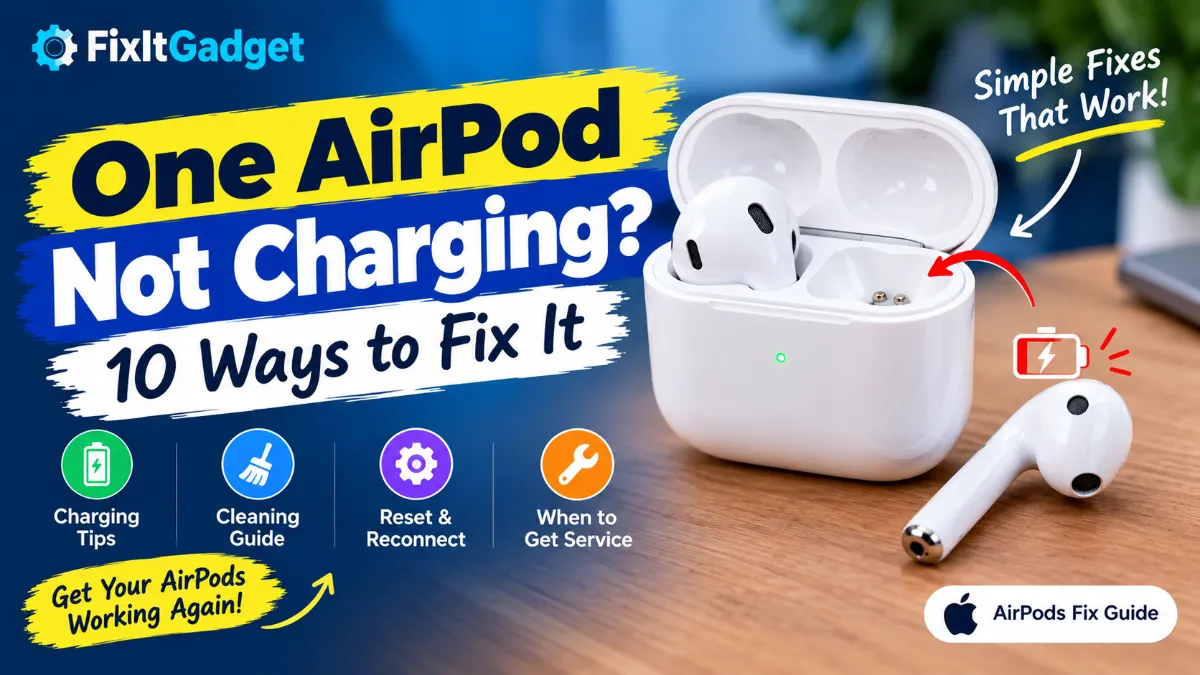
If one AirPod is not charging while the other one works normally, the problem is usually easier to fix than it looks. A low charging-case battery, dirt around the charging contacts, an AirPod that is not sitting correctly in the case, or a temporary software issue can all cause one side to stop charging.
The good news is that you usually do not need to replace the AirPod right away.
Whether you have AirPods, AirPods 2, AirPods 3, AirPods 4, AirPods Pro, or AirPods Pro 2, the troubleshooting process is similar. Start with the simple checks first, because they can solve the problem without changing any settings or resetting your AirPods.
This guide walks through 10 ways to fix one AirPod not charging, starting with the easiest solutions and moving toward more advanced fixes.
One AirPod Not Charging? Start Here
Before changing Bluetooth settings or resetting anything, put both AirPods into the charging case and make sure the case itself has enough battery.
Then leave both AirPods inside the case for at least 15 minutes while the case is connected to power.
After that, check whether the problem AirPod shows a charging status.
If it still shows the same battery percentage, stays at 0%, or does not appear to be charging at all, move through the fixes below in order.
1. Check the AirPods Charging Case Battery
The charging case is the first thing to check.
Your AirPods rely on the case to charge when they are inside it. If the case battery is very low, it may not have enough power to charge the AirPods properly.
Put both AirPods in the case and connect the case to a charger.
Leave it connected for at least 15 minutes before checking again.
On an iPhone or iPad, you can usually see the battery status when you open the AirPods case near the device. You can also check the AirPods battery through the Batteries widget if you have it set up.
Pay attention to whether the left and right AirPod show different battery levels.
For example:
| What you see | What it may mean |
|---|---|
| Left 90%, Right 0% | The right AirPod may not be making contact |
| Left 80%, Right 80% | Both are probably charging normally |
| One AirPod disappears from the battery display | The case may not be detecting it |
| Both AirPods and case show very low battery | Charge the entire setup first |
| Problem AirPod remains at the same percentage | Continue with the next fixes |
If the case itself will not charge, solve the case charging problem first. An AirPod cannot charge normally if the case is not receiving power.
2. Remove and Reseat the Problem AirPod
Sometimes the AirPod is inside the case but is not sitting correctly on its charging contacts.
This can happen if the AirPod was placed in the case at an angle or if something is preventing it from sitting fully down.
Take the problem AirPod out of the case.
Then put it back in carefully.
Make sure it sits all the way down and does not feel loose.
Close the lid for around 30 seconds, then open it again.
If you have an iPhone or iPad nearby, check the battery status.
You want to see whether the problem AirPod is now being detected and whether its battery percentage begins increasing.
A useful test is to remove the working AirPod from the case and leave only the problem AirPod inside.
If the case recognizes the problem AirPod by itself, that is a good sign. It suggests the AirPod may simply have had a poor connection with the charging contacts.
3. Clean the AirPod and Charging Contacts
One of the most common reasons for one AirPod not charging is a dirty charging connection.
Pocket lint, dust, earwax and other small debris can collect around the bottom of an AirPod or inside the charging case.
Even a small amount of buildup can prevent the metal charging contacts from making a reliable connection.
Before cleaning, remove the AirPod from the case.
Use a clean, dry, soft-bristled brush to gently remove visible debris.
You can also wipe the outside of the AirPod with a soft, dry, lint-free cloth.
Be careful around the charging contacts.
Do not use sharp objects such as pins, needles or metal tools to scrape inside the charging case. Do not pour liquid into the case, and do not run your AirPods under water.
If you use a small amount of isopropyl alcohol on a cloth for appropriate external cleaning, make sure you do not allow liquid to enter the charging openings and let the surface dry before putting the AirPod back in the case.
After cleaning, put the AirPod back in the case and check its charging status.
This simple step can make a surprisingly big difference.
4. Check Whether the Case Detects the AirPod
If one AirPod is not charging, it is useful to determine whether the case actually recognizes that AirPod.
Put both AirPods in the case and open the lid near your iPhone or iPad.
Check the battery card.
You should normally see separate battery information for the left and right AirPods.
If one side is missing completely, the case may not be detecting that AirPod.
Try these steps:
- Remove both AirPods from the case.
- Close the case.
- Wait about 30 seconds.
- Open the case.
- Put the problem AirPod back in.
- Keep the lid open near your iPhone or iPad.
- Check the battery status again.
If the missing AirPod suddenly appears, the issue may have been detection or contact rather than a failed battery.
If it still does not appear after cleaning and reseating, continue troubleshooting.
5. Charge the Case With a Cable
If you normally use wireless charging, try charging the case with a cable.
This is a useful way to eliminate the wireless charger as a possible source of the problem.
Depending on your AirPods model, the case may use USB-C or Lightning.
Connect the case directly to a reliable power source and leave it charging for at least 15 minutes with the AirPods inside.
Then check the battery levels again.
If the problem disappears when you use a cable, the AirPods themselves may not have been the main problem. The wireless charging setup may have been the issue.
For wireless charging cases, make sure the case is positioned correctly on the compatible charging surface. If the case does not appear to charge wirelessly, reposition it and try again.
6. Restart Your iPhone or Connected Device
Sometimes the AirPod is charging correctly but the battery information displayed on your iPhone is incorrect.
A simple restart can clear a temporary Bluetooth or battery-status glitch.
Restart the iPhone or iPad that you normally use with the AirPods.
After the device turns back on:
- Put both AirPods in the case.
- Close the lid.
- Wait about 30 seconds.
- Open the lid.
- Bring the case near the device.
- Check the battery status.
If the previously stuck AirPod now shows a different battery percentage, the problem may have been a temporary software or connection issue.
This is one reason it is better to restart the device before performing a full AirPods reset.
7. Forget the AirPods and Pair Them Again
If one AirPod still refuses to charge, the next step is to refresh the Bluetooth connection.
On your iPhone or iPad, open:
Settings > Bluetooth
Find your AirPods under My Devices.
Tap the information button next to the AirPods and choose the option to forget the device.
Then put both AirPods in their charging case and close the lid.
Wait about 30 seconds.
Open the lid and pair the AirPods with your device again.
This does not physically repair a damaged charging contact or battery, so do not expect it to solve a hardware problem. However, it can help when the AirPods are being detected incorrectly or the pairing state has become corrupted.
If the problem AirPod starts charging normally after reconnecting, you likely had a connection or software issue rather than a failed charging component.
8. Reset Your AirPods
If one AirPod is still not charging after the previous steps, resetting the AirPods is worth trying.
The reset process depends on the AirPods model.
AirPods 1, AirPods 2, AirPods 3, AirPods Pro, and AirPods Pro 2
Put both AirPods in the charging case and close the lid.
Wait about 30 seconds.
On your paired iPhone or iPad, go to Bluetooth settings and forget the AirPods if they appear in your device list.
Then open the charging case.
Press and hold the setup button on the back of the case for about 15 seconds.
The status light should flash amber and then white.
Once the light flashes white, you can reconnect the AirPods to your iPhone, iPad or other compatible device.
AirPods 4 and AirPods Pro 3
Newer models use a different reset procedure.
Put both AirPods in the case and close the lid for about 30 seconds.
If the AirPods are paired with an iPhone or iPad, forget them from Bluetooth settings.
Open the case.
Then use the front-of-case tap sequence required for your model to begin the reset. The status light will go through the appropriate flashing sequence before the reset completes.
Afterward, bring the open case close to your device and pair the AirPods again.
Resetting removes custom settings, so you may need to configure some preferences again.
9. Check Whether the AirPod Has a Battery or Hardware Problem
If you have cleaned the contacts, charged the case, reseated the AirPod, restarted your device, re-paired the AirPods and completed a reset, but one AirPod still stays at 0%, the problem may be hardware-related.
This becomes more likely when:
- The problem AirPod never appears in the battery status.
- It remains at 0% after extended charging.
- The other AirPod charges normally.
- Cleaning does not change anything.
- The case works normally with the other AirPod.
- The problem started after a drop or physical damage.
- The AirPod has been exposed to moisture.
- The battery drains immediately after being removed from the case.
At this point, repeatedly resetting the AirPods is unlikely to solve the underlying problem.
AirPods use small batteries, charging contacts and electronic components that can eventually fail.
If the AirPod is several years old, battery wear is another possibility.
That does not necessarily mean the entire AirPods set needs to be replaced.
Apple provides service and replacement options for AirPods and charging cases, depending on the model, coverage and location.
10. Get Apple Service or Replace the Faulty AirPod
If one AirPod still will not charge after trying all the steps above, professional service is the next sensible option.
Before paying for a completely new pair, check whether Apple can service or replace the individual AirPod or charging case.
This can make more financial sense when only one side has failed.
You can also check your AirPods’ model and serial number before contacting support.
When speaking with Apple Support or a service provider, explain exactly what you already tested.
For example:
“My right AirPod stays at 0% while the left AirPod charges normally. I charged the case, cleaned the contacts, restarted my iPhone, re-paired the AirPods and reset them.”
That gives the technician a much clearer picture of the problem.
If the AirPod has physical damage or an old battery, replacement may ultimately be the best option.
Why Is One AirPod Not Charging?
If one AirPod is not charging, there are several possible reasons.
Dirty charging contacts
Dust or debris can stop the AirPod from making proper contact with the case.
AirPod not seated correctly
The AirPod may be inside the case but not positioned correctly over the charging contacts.
Low case battery
A nearly empty charging case may not be able to provide enough power.
Charging accessory problem
A faulty cable, adapter or wireless charging setup can prevent the case from charging properly.
Bluetooth or software glitch
Your device may incorrectly display the AirPod’s charging status.
Battery degradation
An older AirPod battery may no longer hold or accept a normal charge.
Physical damage
A drop, liquid exposure or other damage can affect the charging hardware.
The key is to identify which of these is actually happening instead of immediately assuming the AirPod is dead.
How to Tell if Your AirPod Is Actually Charging
One of the easiest ways to troubleshoot the problem is to watch the battery status.
Place both AirPods inside the charging case.
Open the lid near your iPhone or iPad and check the battery information.
You are looking for two things:
First, does the problem AirPod appear?
If it does not appear at all, the case may not be detecting it.
Second, does the battery percentage increase?
If it appears but stays at the same percentage for a long time, the AirPod may not be receiving power.
Try leaving it in the case while the case is connected to power.
Then check again.
If the percentage increases, the AirPod is charging and the earlier issue may have been related to the case battery, contact or detection.
What If Only the Left AirPod Is Not Charging?
The same troubleshooting steps apply whether the left or right AirPod is affected.
If the left AirPod is the problem:
- Remove it from the case.
- Clean the bottom of the AirPod.
- Check the corresponding charging area inside the case.
- Put the left AirPod back in firmly.
- Charge the case.
- Check the battery status.
- Restart your connected device.
- Re-pair the AirPods if necessary.
- Reset the AirPods if the problem continues.
- Consider service if the left AirPod still stays at 0%.
Do not assume the left AirPod itself is defective until you have tested the charging case and connection.
What If Only the Right AirPod Is Not Charging?
If the right AirPod is the one that refuses to charge, follow exactly the same process.
The important test is whether the case recognizes the right AirPod and whether its battery percentage changes while it is sitting in the case.
If the left AirPod charges normally but the right one does not, the comparison can actually help you diagnose the issue.
For example, if both AirPods fit normally but only the right one remains at 0%, the right-side charging contact, battery or internal hardware becomes more suspicious.
One AirPod Shows 100% but Dies Quickly
This is slightly different from an AirPod that never charges.
If the AirPod reaches 100% but dies much faster than the other side, the charging system may be working while the battery itself is aging.
Older lithium-ion batteries gradually lose capacity.
You may notice this as:
- One AirPod lasting much less than the other
- Battery percentage dropping unusually quickly
- One side shutting down while the other still has plenty of charge
- The AirPod appearing fully charged but lasting only a short time
In this situation, cleaning and resetting may not make a significant difference.
Battery service or replacement may be the more practical solution.
One AirPod Not Charging After Getting Wet
If your AirPods have recently been exposed to water, sweat or another liquid, do not immediately try aggressive charging or cleaning methods.
Do not put them under running water and do not use sharp objects to clean the charging contacts.
Allow the AirPods and case to dry properly and follow Apple’s cleaning and care guidance for your model.
If charging problems continue after liquid exposure, professional inspection may be necessary.
Water resistance also does not mean an AirPod is waterproof or immune to liquid damage.
Can a Software Update Fix One AirPod Not Charging?
Sometimes an AirPods problem can be related to software or firmware, but a software update is not a guaranteed fix for a charging-contact or battery problem.
If your AirPods are behaving strangely, make sure your connected Apple device is running a current version of its software.
If the AirPods are physically failing to make charging contact, however, updating your iPhone will not repair a damaged contact or worn-out battery.
That is why physical checks should come before assuming the problem is software.
When Should You Stop Troubleshooting?
You do not need to spend hours resetting your AirPods repeatedly.
If you have already:
- Fully charged the case
- Reseated the AirPod
- Cleaned the charging area safely
- Checked the battery status
- Tried cable charging
- Restarted your iPhone or iPad
- Re-paired the AirPods
- Reset the AirPods
and the same AirPod still does not charge, it is reasonable to consider service.
Repeated resets will not fix a physically damaged charging contact or a failed battery.
Frequently Asked Questions
Why is one AirPod not charging?
The most common possibilities include a low charging-case battery, dirty charging contacts, poor contact between the AirPod and case, a temporary software issue, battery degradation or hardware damage.
How long should I charge AirPods that are not charging?
Start by connecting the charging case to power and leaving the AirPods inside for at least 15 minutes. Then check the battery status again.
Why does one AirPod stay at 0%?
If one AirPod stays at 0% while the other charges normally, check whether the problem AirPod is being detected by the case. Clean the charging area, reseat the AirPod and charge the case before trying a reset.
Can cleaning fix one AirPod not charging?
Yes, cleaning can help if dust, lint or other debris is preventing the AirPod from making proper contact with the charging contacts. Clean carefully and avoid sharp objects or liquid inside the case.
Should I reset my AirPods if one is not charging?
A reset can help if the issue is related to pairing or software, but it will not repair physical damage or a failed battery. Try the simpler charging and cleaning checks first.
What if my AirPod is still not charging after a reset?
If one AirPod remains at 0% or is not detected after charging, cleaning, re-pairing and resetting, the problem may be hardware-related. Apple Support or an authorized service provider can determine whether the AirPod or charging case needs service or replacement.
Do I need to buy a new pair if one AirPod stops charging?
Not necessarily. Depending on the problem, model and service availability, you may be able to have the individual AirPod or charging case serviced or replaced instead of replacing the entire set.
Final Thoughts
When one AirPod is not charging, do not assume that the AirPod has failed immediately.
Start with the simple things: charge the case, reseat the AirPod and check its battery status. Then clean the charging area carefully and make sure the case can detect the problem AirPod.
If that does not work, restart your device, reconnect the AirPods and try a model-appropriate reset.
Most importantly, pay attention to what changes after each step. If the AirPod starts appearing in the battery status after cleaning or reseating, you have probably found a contact or detection problem. If it remains completely unresponsive after every software and charging test, hardware or battery failure becomes much more likely.
The goal is not to reset everything and hope for the best. It is to narrow down the problem step by step so you know whether you can fix it at home or whether the AirPod actually needs service.
Read More : IPhone Battery Draining Fast? 15 Ways to Fix Battery Drain